Today I finally got my SONY VAIO VPCS11J7E laptop delivered after a warranty repair. They replaced a few parts and thoroughly cleaned the laptop. Now it looks as new apart from a small crack on flimsy plastic around the hinges (I rejected their generous offer to replace the plastic for 200 quid.)
I immediately wiped out Windows 7 and (other) junkware that they had put on my laptop eating up a huge chunk of my precious SSD space, and installed Ubuntu Oneiric Ocelot. Due to this rare opportunity of having a fresh install of Ubuntu I decided to do some tests to see how well this laptop's hardware is supported in this OS both out of the box and with additional drivers. So I ran the complete set of tests from the System Testing utility. The full report is available here.
As you can see from the test results most laptop's hardware is supported out of the box. It includes graphics that works both with open source and proprietary drivers, networking, camera, card reader, etc. So I will only focus on the few things that are not working and how to fix them. Note that although optical drive test fails the drive itself works perfectly. However the default disk burning software (Brasero) has some problems with it, like being unable to eject disks. So I recommend using K3b instead.
Microphone
To get rid of the annoying cracking noise reported
here
add the following line to /etc/modprobe.d/alsa-base.conf:
options snd-hda-intel position_fix=2
Now restart the system and enjoy the clear sound of your voice.
Brightness control
Download the latest version of the nvidiabl driver (version 0.72 of the driver is available here) and install it:
$ sudo dpkg -i nvidiabl-dkms_0.72_all.deb
It enables the control of laptop backlight connected to NVIDIA chip
using the /sys/class/backlight interface.
To make the brightness control Fn keys work get the required scripts
from nvidiabl repository and
copy them to /etc:
$ git clone https://github.com/guillaumezin/nvidiabl.git
$ sudo cp -R nvidiabl/scripts/etc/* /etc
External monitor
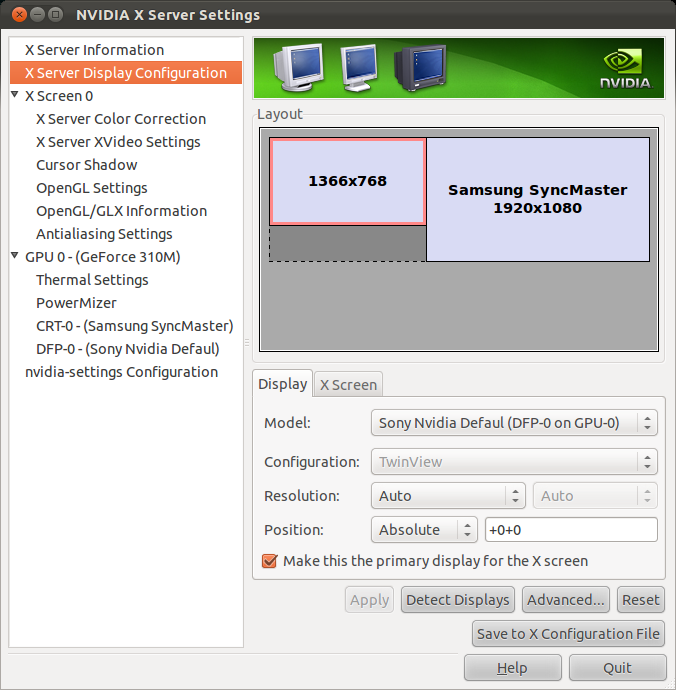
To enable external monitor with proprietary NVIDIA drivers:
- Open NVIDIA X Server Settings.
- Go to "X Server Display Configuration".
- Click "Detect Displays".
- Select the external display and choose TwinView in "Configuration".
- Click Apply.
- Click "Save to X Configuration File" if you want to make this configuration permanent.
Alternatively set the following options in the Screen section of
/etc/X11/xorg.conf and restart the X server:
Section "Screen"
    ...
    Option "TwinView" "1"
    Option "TwinViewXineramaInfoOrder" "DFP-0"
    Option "metamodes" "DFP: nvidia-auto-select +0+0, CRT: nvidia-auto-select +1366+0"
    ...
EndSection
Last modified on 2011-12-08