One of the first IDEs that I used was Visual Studio 6.0 (shudder). It was a daunting experience, both the IDE and compiler were buggy, I remember having to reformulate perfectly valid programs to avoid internal compiler errors, standard compliance was something unheard of. I’m not sure how I didn’t give up programming altogether. The reason I used it despite all the problems is that I didn’t know about anything better at that time and due to the work requirements. Fortunately none of these is longer the case.
I’ve used several IDEs since then and my current IDE of choice is Eclipse which I think is a brilliant piece of software. It is a multi-language IDE which supports pretty much every well-known computer language and a few esoteric ones either via plugins or specialized versions of IDE. I’m not using the term “programming language” intentionally because Eclipse supports languages that have little to do with programming, at least in its usual definition. For example, I wrote my PhD thesis using TeXlipse, a plugin that add LaTeX support to Eclipse. The new AMPL IDE is also based on Eclipse.
In this post I’ll share my experience with setting up Eclipse CDT in Linux, namely Ubuntu 13.04 which happens to be the OS I have right now.
The version of Eclipse that comes in Ubuntu repositories is usually a bit outdated. So I recommend using the latest version from Eclipse Downloads. The price to pay for this, however, is that the latest version will not be as well-integrated with Ubuntu as the one from the repositories.
In particular, you can’t add the Eclipse executable directly to the
Unity Launcher, you have to do it via a .desktop file like
this one which should be placed in the Eclipse
directory. This .desktop file assumes that
you have Eclipse installed in /opt/eclipse. If this is not the case,
edit the file changing the path to icon.xpm appropriately. Then you
can add Eclipse to the Launcher by dragging the Eclipse.desktop file
there or running it and choosing “Lock to Launcher” in the context menu.
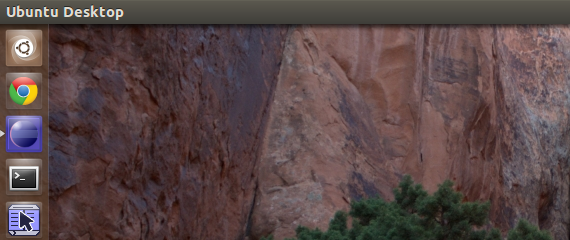
And voilà: you have a shiny blue Eclipse icon in the Launcher.

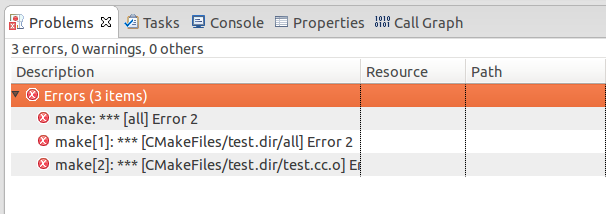
Now from trivial stuff to something more interesting. If you have ever worked with Eclipse project generated with CMake, you have probably noticed that there are a few annoying errors that are not cleared between the builds:

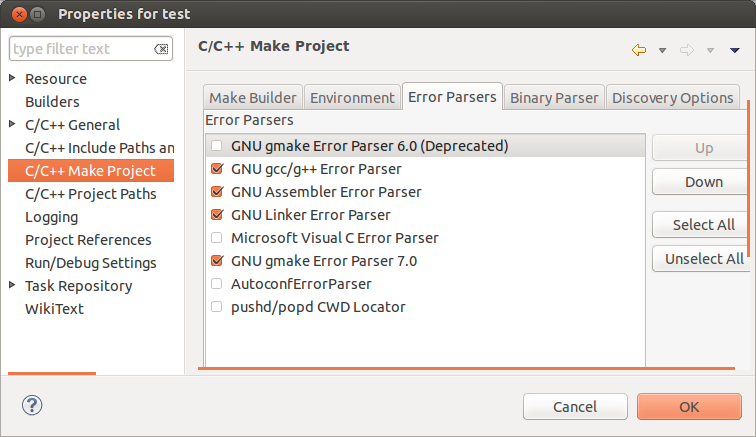
The fix for this problem, the idea of which I borrowed from this blog post, has been accepted in CMake and will hopefully appear in version 2.8.12. In the meantime you can either use the developement version of CMake or manually change the error parser from “GNU gmake Error Parser 6.0 (Deprecated)” to “GNU gmake Error Parser 7.0” in Project Properties:

Another problem that I had recently is a very slow debugging experience. For example, it took more than 30 seconds to populate the Debug view showing the list of threads and the call stack. The tooltips with information about variables’ values and types were also populated very slowly. As it turned out the problem was in gdb and updating to version 7.6 built from the source resolved it (gdb version 7.6-5ubuntu2 from Ubuntu repositories was not good enough):
$ sudo apt-get install libncurses5-dev
$ wget http://ftp.gnu.org/gnu/gdb/gdb-7.6.tar.gz
$ tar xzf gdb-7.6.tar.gz
$ ./configure
$ make -j6
$ sudo checkinstall
I actually planned to write about a few more things, but it turned out that the things I wanted to write about have been fixed in the latest version of Eclipse and no longer require any user intervention. The pace of Eclipse development is pretty high and bugs are often fixed quickly, so it is important to have the most recent version of the software.
Update
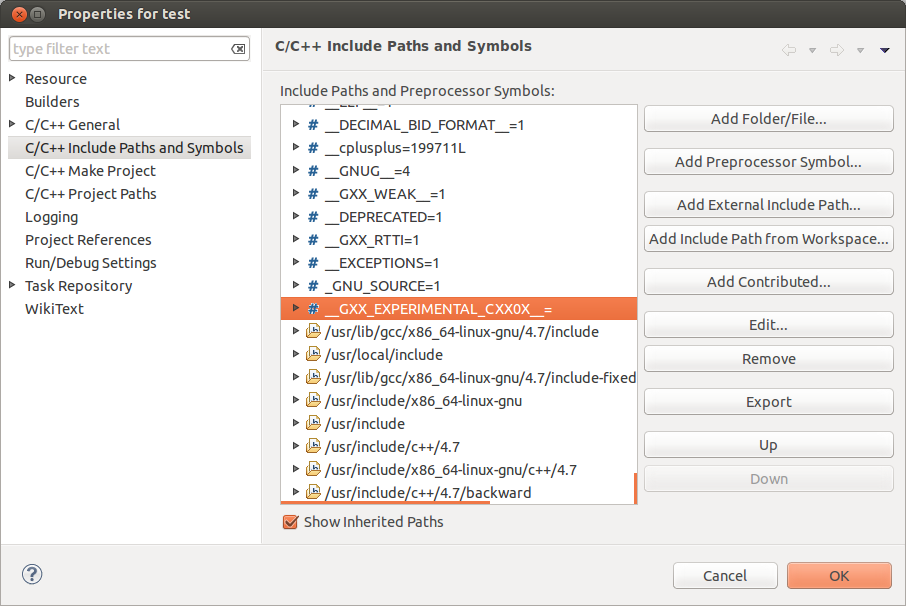
If Eclipse complains about some C++11 library feature add __GXX_EXPERIMENTAL_CXX0X__
to Preprocessor Symbols in Project Properties -> C++ Include Paths and Symbols
and rebuild the index:

Happy coding!
Last modified on 2013-08-29